Found a Tick on Your Dog
Here's What to Do
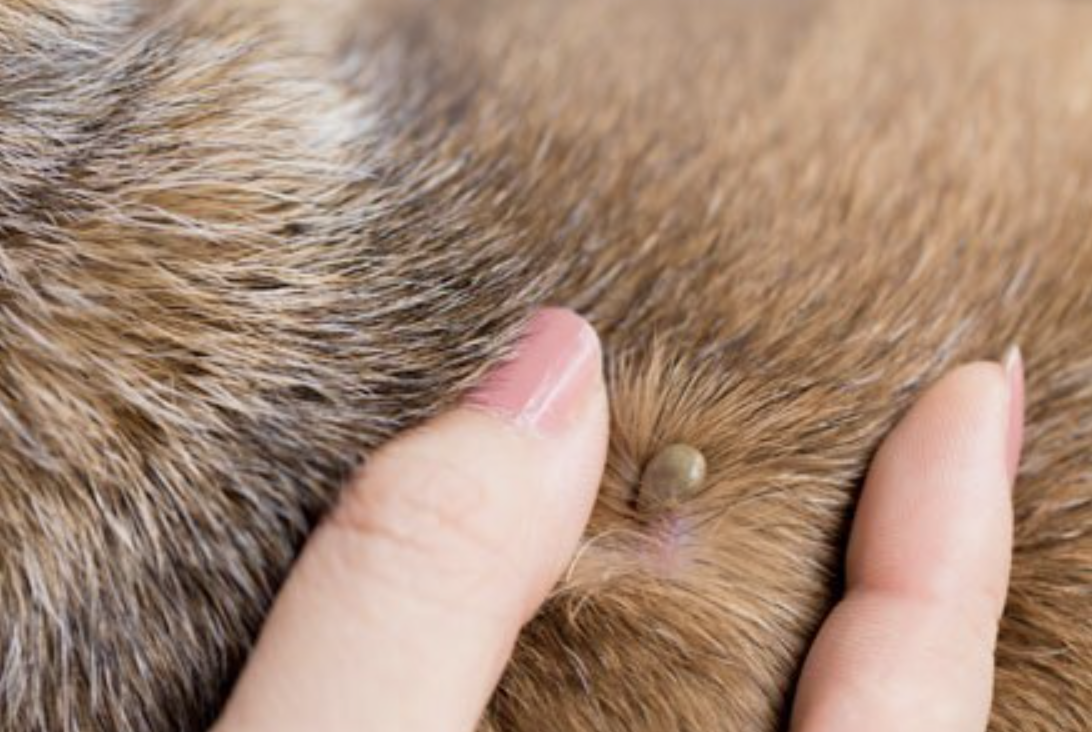
Discovering a tick attached to your dog can be unsettling, but acting quickly and correctly can help reduce the risk of infection and tick-borne diseases. Whether you've just returned from a hike, a walk through tall grass, or simply spending time in your backyard, knowing how to safely remove a tick is an important part of pet ownership.
Step 1: Remove the Tick Safely
The first step is to remove the tick as soon as possible.
What You'll Need
Fine-tipped tweezers or a specialized tick-removal tool
Gloves (optional but recommended)
Good lighting
Proper Removal Technique
Part your dog's fur so you can clearly see the tick.
Using tweezers, grasp the tick as close to your dog's skin as possible.
Pull straight outward with steady, even pressure until the tick releases.
What to Avoid
Many common tick-removal myths can actually increase the risk of infection.
Avoid:
Twisting or jerking the tick
Squeezing the tick's body
Burning the tick or applying petroleum jelly
These methods can cause the tick's mouthparts to break off or force potentially harmful fluids into your dog's bloodstream.
Step 2: Clean the Area and Dispose of the Tick
Once the tick has been removed, it's important to disinfect the area.
Clean the Bite Site
Use one of the following:
Pet-safe antiseptic
Rubbing alcohol
Warm, soapy water
You may also apply a small amount of antibiotic ointment to help keep the area clean.
Dispose of the Tick Properly
Place the tick in a sealed container filled with rubbing alcohol to kill it. Never crush a tick with your fingers, as this can expose you to disease-causing organisms.
Step 3: What If the Tick's Head Stays Behind?
If part of the tick remains embedded in your dog's skin, don't panic.
The remaining mouthparts often work their way out naturally as the skin heals. If they are easily accessible, you can attempt gentle removal with clean tweezers. However, if they are deeply embedded, it's usually best to leave them alone.
Monitor the area closely for:
Increased redness
Swelling
Discharge
Signs of discomfort
If the site becomes irritated or appears infected, contact your veterinarian.
Step 4: Watch for Signs of Tick-Borne Disease
Even after successful removal, continue monitoring your dog over the next several weeks. Ticks can transmit diseases such as Lyme disease, Anaplasmosis, Ehrlichiosis, and others.
Contact your veterinarian immediately if your dog develops any of the following symptoms:
Lethargy or unusual tiredness
Weakness
Stiffness or limping
Loss of appetite
Fever
Swollen or painful joints
Early diagnosis and treatment can make a significant difference in recovery.
Prevention Is the Best Protection
The best way to protect your dog from ticks is to prevent bites before they happen.
Talk with your veterinarian about year-round tick prevention options, including:
Oral medications
Topical treatments
Tick collars
Environmental control measures
Regularly checking your dog for ticks after outdoor activities can also help catch them before they have a chance to transmit disease.
When to Call Your Veterinarian
Seek veterinary guidance if:
You're uncomfortable removing the tick yourself
The tick is attached in a sensitive area
The bite site becomes severely inflamed
Your dog develops symptoms of illness after a tick bite
A quick response can help keep your pet healthy and comfortable throughout tick season.
Final Thoughts
Ticks are a common part of outdoor life, but they don't have to become a serious health concern. By knowing how to remove them properly, monitoring your dog afterward, and maintaining a reliable prevention plan, you can help keep your four-legged family member safe all year long.